The ability to use scissors plays an important role in the formation of small motor skills and helps a child not only to hold a pencil or pen in hand, but also to use it properly. Having learned to cut, a child will more easily master the skill of accurate writing. Cutting sounds simple, but in practice it is important not to miss the sensitive development of this skill. Regularly stimulate your child in this occupation by means of different exercises. Before long, they will learn to cut out shapes and other items with ease.
Stages of Study
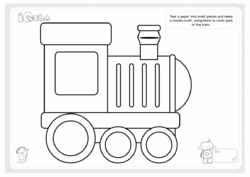
Mastering the use of scissors will be more effective in the following order:
- Tear: Tear paper into small pieces or along a straight line
- Cut in any direction
- Make a fringe, cut lines according to a template
- Cut in a straight line without any outline
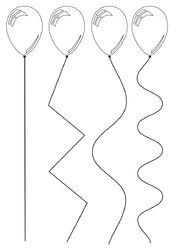
- Cut zigzag lines
- Cut figures with round angles or curves (circles, waves, hearts, etc.)
- Cut figures with straight angles (squares, rectangles)
Tearing a strong paper, for example, colored cardboard or packing paper, is a fine occupation for small children who are still mastering scissors. Kids should master the plucked movements, learning to operate with their thumb, index, and middle finger. While tearing, it is necessary to operate the hand to turn the paper in the necessary direction. This movement develops general coordination skills. So if you have a child of 2-3 years, take this occupation seriously. You can prepare paper strips, and then ask your child to tear them into smaller pieces. You can then create whole panels if you use the small pieces as a mosaic application.
Cutting is, in general, the action of opening and closing scissors around a piece of paper. At the very beginning of acquainting a child with scissors, we recommend you prepare paper strips which can be cut across with one stroke. Cutting will help you child develop the small muscles of the hands which will be necessary in the future to make incision across longer lines without getting tired. Pay attention and give this stage sufficient time.
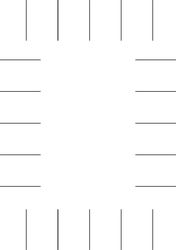
Cutting a fringe teaches a child to stop the movement of the scissors at a necessary point. It isn't as simple as it seems. Even if your kid's first attempt was successful, continue to offer him various hand-made crafts in which it is necessary to cut a fringe. Your purpose is to build the child's hand muscles so they won’t tire out during cutting. You will know this has been achieved when you see flat lines of a cut, without "wiggles" or paper tears made by the scissors.
Useful Tips
An important skill which helps teach a child to cut with scissors is hand and eye coordination, as well as coordination of both hemispheres of the brain. For example, to cut out a square, a child not only moves the scissors according to a template, but must also correct the sheet of paper with the other hand, directing the necessary distance and turning at a necessary angle. It is not the same as just opening and closing the scissors.
Here is some final advice on how to facilitate the development of using a many-sided tool like scissors for a preschool child.
- Spend the extra money for high-quality scissors for beginners. You should be able to open and close them without any effort, and they should have protective slips and rings, convenient for a child's hand. Cheaper scissors will lead to over fatigue of the hand, mistakes, and frustration with the scissors.
- Wrap up the thumb of a child with plaster or a piece of a bright insulating tape for one of rings of scissors. The wrong positioning - either too close to the palm or too close to edge of the finger - can result in fast exhaustion of the child’s hand.
- When a child masters one click of the scissors, cut not only paper, but also straws, Q-tips, unnecessary elastic bands, pieces of thin wire, blisters from tablets, and other hard material. Take care that the child understands the accurate distinction between working material and the objects which are in the house. Make sure they know to cut only in the presence of adults, at a table, and to take objects only from special containers or boxes. If something isn't in the special box and adults don't know - it is impossible to cut!
- Smoothly go from cuts on a template to cuts without a template. If at first you prepare a template using a ruler, next note only dots between which it is necessary to cut a section. Ask the child to cut from a dot to a dot as exactly as possible. At the beginning use your sample. From time to time, mark the date and keep the child’s work to monitor their progress.
- It is possible to offer old cards, magazines, and even pieces of wallpaper to a child for collages. They can use these items to cut out irregular shapes.
In order to not turn occupation with scissors into a boring lesson, invent a purpose for which cutting will be used. Create models, applications, collages, and hand-made articles which can be presented to friends - then cutting will be a pleasure for your child!

